EN
EN


Optimize Electric Outdoor Infrared Heater Usage
Getting the most out of an electric outdoor infrared heater is not simply a matter of plugging it in and pointing it at a seating area. Infrared heating technology works on fundamentally different principles than convection-based systems, and understanding those principles is the first step toward smarter, more efficient use. Whether you manage a commercial patio, a hospitality venue, or a private outdoor living space, optimizing how you deploy and operate an electric outdoor infrared heater directly affects comfort levels, energy consumption, and equipment longevity.
An electric outdoor infrared heater emits radiant energy that travels in a straight line and warms objects and people directly, rather than heating the surrounding air. This makes placement, angle, mounting height, and operational scheduling far more consequential than they would be with a conventional heater. Small adjustments in how you position or program an electric outdoor infrared heater can produce significant differences in perceived warmth, coverage area, and running costs. This article walks through the key optimization strategies that experienced operators and facility managers use to extract maximum value from their infrared heating investment.
Understanding How an Electric Outdoor Infrared Heater Delivers Heat
Radiant Heat Versus Convective Heat
The core distinction that shapes every optimization decision is the difference between radiant and convective heat transfer. A convective heater warms the air, which then circulates to warm people and surfaces. An electric outdoor infrared heater bypasses the air entirely and delivers energy directly to whatever falls within its beam. This is why infrared heating feels immediate and why it remains effective even in breezy or partially open environments where warm air would simply disperse.
Because the heat is directional, the angle and orientation of the unit determine who benefits from it. A heater aimed too high or too low will waste a significant portion of its output on surfaces that do not need warming. Understanding this directional nature is the foundation of every placement and configuration decision you will make when optimizing an electric outdoor infrared heater installation.
Radiant heat also interacts with surfaces differently depending on their material and color. Dark, matte surfaces absorb infrared energy efficiently, while reflective or light-colored surfaces may redirect some of it. This matters when you are thinking about the objects and furnishings within the heater's coverage zone, as well as the mounting surface behind the unit itself.
Wattage, Wavelength, and Coverage Area
An electric outdoor infrared heater is typically rated in watts, and that wattage determines both the intensity of heat output and the effective coverage radius. As a general principle, higher wattage units cover larger areas but require more careful aiming to avoid creating uncomfortably hot spots directly beneath the unit. Lower wattage units are better suited to smaller, more intimate seating arrangements where precision matters more than broad coverage.
Wavelength is another technical factor that influences optimization. Short-wave infrared heaters produce a bright, intense beam with a relatively narrow coverage angle and very fast warm-up times. Medium-wave and long-wave units produce a softer, more diffuse heat that feels gentler and covers a wider area, though they take slightly longer to reach full output. Matching the wavelength profile of your electric outdoor infrared heater to the specific use case — high-traffic commercial patio versus quiet residential terrace — is a meaningful optimization lever.
Always cross-reference the manufacturer's stated coverage area with the actual geometry of your space. Manufacturer figures are typically measured under ideal conditions. In real-world outdoor environments with wind, open sides, and varying ceiling heights, effective coverage may be 15 to 25 percent smaller than the stated specification. Plan your installation with this margin in mind.
Optimal Placement and Mounting Strategies
Mounting Height and Beam Angle
Mounting height is one of the most impactful variables in optimizing an electric outdoor infrared heater. Most manufacturers recommend a mounting height between 2.1 and 3.5 meters for standard patio applications, but the ideal height depends on the unit's wattage and beam angle. A higher mounting position increases coverage area but reduces intensity at ground level. A lower position concentrates heat more intensely over a smaller zone.
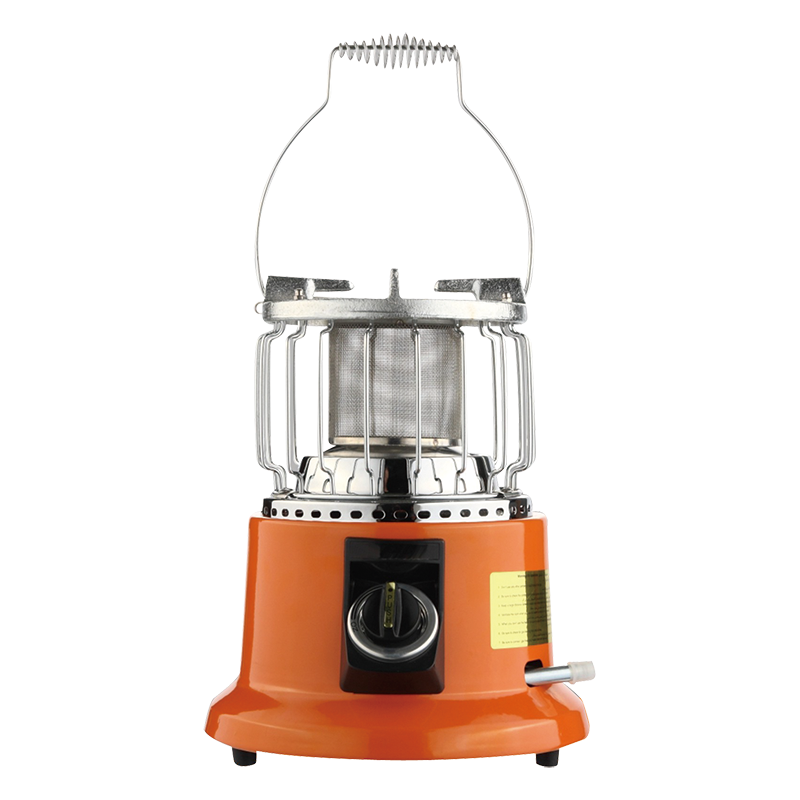
The beam angle of the electric outdoor infrared heater should be tilted slightly downward toward the occupancy zone rather than projecting horizontally. A downward tilt of approximately 30 to 45 degrees from horizontal is a common starting point for wall-mounted or ceiling-mounted units. This ensures that the radiant energy reaches seated or standing occupants at torso and head level, which is where thermal comfort is most perceptible.
Avoid mounting an electric outdoor infrared heater directly above seating without adequate height clearance. When the unit is too close to occupants directly beneath it, the heat intensity can become uncomfortable even at moderate wattage settings. Offset mounting — positioning the heater slightly to the side of the primary seating zone rather than directly overhead — often produces a more even and comfortable heat distribution.
Spacing Multiple Units for Even Coverage
In larger outdoor spaces, a single electric outdoor infrared heater is rarely sufficient. Spacing multiple units correctly is essential to avoid cold gaps between coverage zones and uncomfortable hot spots where beams overlap. A common approach is to calculate the coverage radius of each unit and then space units so that their coverage zones overlap by approximately 20 percent at the edges. This creates a continuous thermal envelope without excessive intensity in any one area.
For long, narrow spaces such as covered walkways or bar counters, a linear arrangement of lower-wattage electric outdoor infrared heater units spaced evenly along the length of the space typically outperforms a smaller number of high-wattage units. The lower-wattage approach distributes heat more evenly and reduces the risk of thermal discomfort for guests seated directly beneath any single unit.
When planning a multi-unit installation, consider the orientation of each electric outdoor infrared heater relative to prevailing wind direction. Positioning units so that their beams project into the wind — rather than with the wind — helps counteract the cooling effect of air movement and maintains perceived warmth more effectively for occupants in the space.
Operational Scheduling and Energy Efficiency
Using Timers and Thermostatic Controls
One of the most straightforward ways to optimize the running cost of an electric outdoor infrared heater is to use timer controls and, where available, thermostatic or occupancy-based switching. Unlike gas heaters, an electric outdoor infrared heater reaches full output almost instantly, which means there is no warm-up penalty for switching it on only when needed. This characteristic makes demand-based operation highly practical and cost-effective.
Programmable timers allow you to align heater operation with known occupancy patterns. A restaurant patio that fills up between 6 PM and 10 PM does not need heating during the afternoon setup period. Configuring the electric outdoor infrared heater to activate 10 minutes before service begins and shut down automatically at closing time eliminates unnecessary energy consumption without any manual intervention from staff.
Thermostatic controls add another layer of optimization by modulating output based on ambient temperature. On milder evenings, the heater operates at reduced power; on colder nights, it ramps up automatically. This prevents the common inefficiency of running an electric outdoor infrared heater at full power regardless of actual thermal conditions, which is a significant source of wasted energy in many commercial installations.
Dimming and Power Level Adjustment
Many modern electric outdoor infrared heater models support dimming or multi-stage power settings, typically offering 50 percent, 75 percent, and 100 percent output levels. Using the lowest power level that still achieves the desired comfort level is a simple but effective optimization strategy. In practice, many operators default to full power out of habit, even in conditions where a lower setting would be entirely adequate.
Dimming also extends the service life of the heating element. Running an electric outdoor infrared heater at full power continuously subjects the element to maximum thermal stress. Moderate power settings reduce element temperature and thermal cycling, which translates to longer intervals between maintenance and a lower likelihood of premature element failure.
If your installation includes multiple units, consider staggering power levels across the array rather than running all units at the same setting. This can create a more nuanced thermal gradient across the space, with higher output near the perimeter where heat loss is greatest and lower output in the more sheltered central areas.
Maintenance Practices That Preserve Performance
Cleaning and Inspecting the Heating Element
The performance of an electric outdoor infrared heater degrades over time if the heating element and reflector are not kept clean. Dust, grease, and environmental debris accumulate on the reflector surface and reduce its ability to direct radiant energy efficiently. A dirty reflector can reduce effective heat output by a measurable margin even when the element itself is functioning correctly.
Cleaning the reflector of an electric outdoor infrared heater should be done with the unit fully powered off and cooled down. A soft, lint-free cloth and a mild non-abrasive cleaner are sufficient for most reflector surfaces. Avoid abrasive materials that could scratch the reflective coating, as even minor surface damage reduces reflectivity and heat projection efficiency.
Inspect the heating element visually at regular intervals. Look for signs of discoloration, cracking, or uneven glow patterns when the unit is operating. An element that glows unevenly or shows dark spots may be approaching the end of its service life. Replacing the element proactively, before it fails completely, avoids unexpected downtime and ensures consistent performance from your electric outdoor infrared heater installation.
Weatherproofing and Seasonal Storage
Even units rated for outdoor use benefit from additional protection during periods of non-use or extreme weather. Covering an electric outdoor infrared heater with a purpose-made weatherproof cover when it is not in use for extended periods protects the element, reflector, and electrical connections from moisture ingress, UV degradation, and physical damage from debris.
Check the IP rating of your electric outdoor infrared heater and ensure that the installation environment matches or exceeds the rated protection level. A unit rated IP44 is protected against splashing water but is not suitable for direct rain exposure without additional shelter. Mismatching the IP rating to the installation environment is a common cause of premature electrical failure in outdoor heating installations.
At the end of the heating season, inspect all electrical connections, mounting hardware, and cable management components. Outdoor environments subject these components to thermal cycling, moisture, and UV exposure throughout the season. Tightening connections, replacing corroded hardware, and resealing any cable entry points before storage ensures that the electric outdoor infrared heater is ready for reliable operation when the next season begins.
Matching the Heater to the Space and Use Case
Assessing the Thermal Envelope of Your Outdoor Space
Optimization begins before installation with an honest assessment of the space you are trying to heat. Fully open spaces with no overhead cover lose heat rapidly and require higher wattage or denser unit spacing to maintain comfort. Semi-enclosed spaces with a roof or pergola overhead retain radiant heat more effectively, allowing a lower-wattage electric outdoor infrared heater configuration to achieve the same comfort level.
Wind exposure is the single largest variable affecting the perceived effectiveness of an electric outdoor infrared heater in an outdoor setting. Even a moderate breeze significantly increases the rate at which body heat is lost, requiring the heater to work harder to maintain comfort. Where possible, use windbreaks — glass panels, planters, screens, or architectural features — to reduce wind exposure in the primary occupancy zone before sizing your heater installation.
Ceiling height in covered outdoor areas also affects optimization decisions. Higher ceilings require the electric outdoor infrared heater to be aimed more steeply downward to keep the beam within the occupancy zone, and the greater distance from heater to occupant reduces intensity. In very high-ceiling environments, wall-mounted units positioned lower on the wall and aimed horizontally across the space may outperform ceiling-mounted units aimed steeply downward.
Aligning Heater Specification with Occupancy Patterns
The way a space is used should directly inform how the electric outdoor infrared heater is specified and configured. A high-turnover commercial patio where guests are seated for 45 to 90 minutes benefits from fast-response short-wave units that deliver immediate warmth. A residential terrace used for extended evening gatherings may be better served by medium-wave units that produce a gentler, more sustained heat output.
Consider the density of occupancy as well. A densely packed seating arrangement generates significant body heat, which reduces the thermal load that the electric outdoor infrared heater needs to carry. A sparse seating arrangement with wide spacing between guests requires the heater to do more work to maintain individual comfort. Adjusting power levels and unit spacing to reflect actual occupancy density is a practical optimization that many operators overlook.
For spaces with variable use — a venue that hosts both intimate dinners and large events — consider a zoned installation where sections of the electric outdoor infrared heater array can be activated independently. This allows the heating system to scale with actual occupancy rather than running at full capacity regardless of how much of the space is in use.
FAQ
What is the ideal mounting height for an electric outdoor infrared heater?
For most standard patio applications, a mounting height between 2.1 and 3.5 meters is recommended. The exact ideal height depends on the unit's wattage and beam angle. Higher mounting increases coverage area but reduces intensity at occupant level, while lower mounting concentrates heat more intensely over a smaller zone. Always follow the manufacturer's guidance and adjust the beam angle downward by approximately 30 to 45 degrees from horizontal to direct heat toward the occupancy zone.
How often should I clean and maintain an electric outdoor infrared heater?
A visual inspection and light cleaning of the reflector and element should be performed at least once per season, or more frequently in environments with high grease, dust, or pollen exposure. A dirty reflector can noticeably reduce heat output even when the element is functioning correctly. Full maintenance checks including electrical connections and mounting hardware should be carried out at the start and end of each heating season.
Can I use an electric outdoor infrared heater in a fully open, unshielded outdoor space?
Yes, an electric outdoor infrared heater can be used in fully open spaces, but effectiveness will be lower than in semi-enclosed environments because radiant heat is absorbed by people and surfaces rather than retained in the air. Wind exposure significantly increases perceived heat loss. To optimize performance in open spaces, use windbreaks to reduce air movement in the occupancy zone, increase unit wattage or density, and position units to project heat into the prevailing wind direction rather than with it.
Does dimming an electric outdoor infrared heater reduce its lifespan?
No — in fact, operating an electric outdoor infrared heater at reduced power settings generally extends element lifespan by reducing thermal stress and the frequency of high-temperature cycling. Running at full power continuously subjects the element to maximum stress. Using the lowest power level that achieves the desired comfort level is both energy-efficient and beneficial for long-term equipment reliability.